
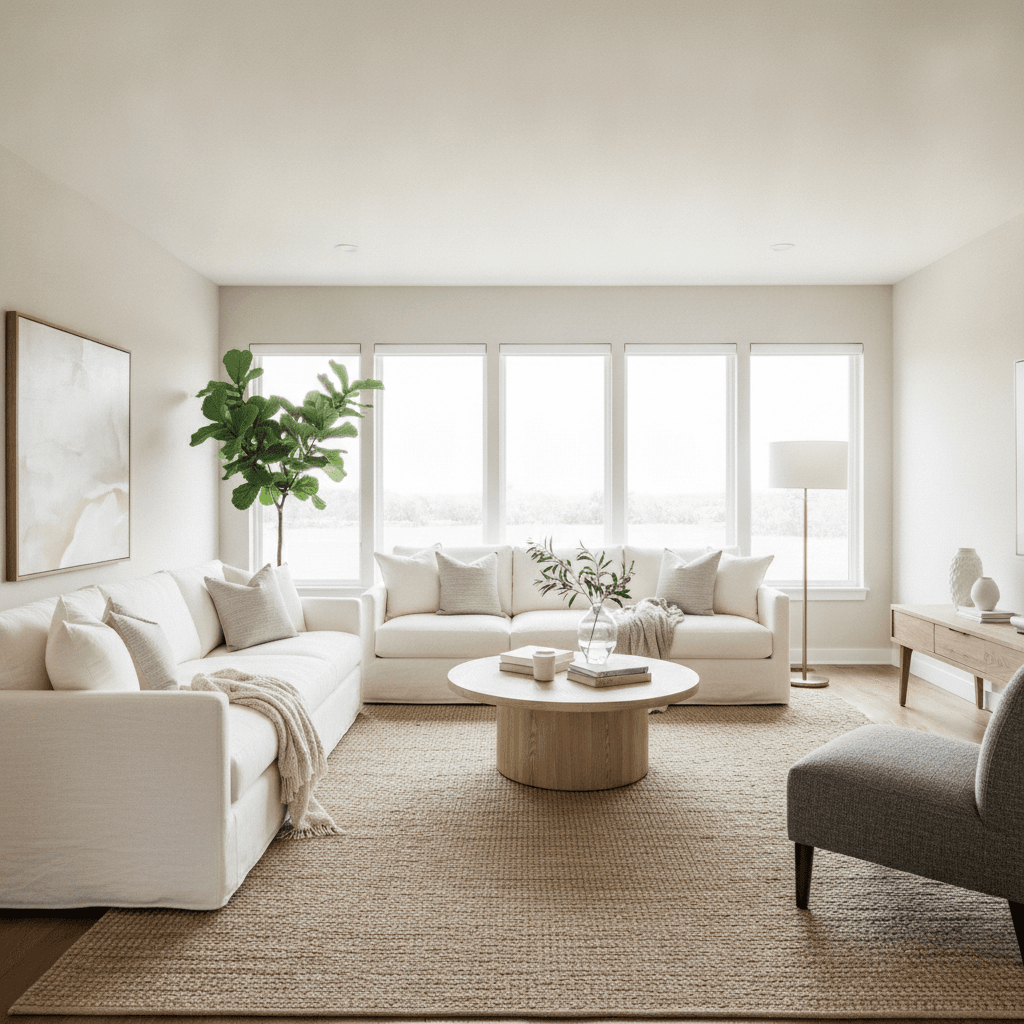
Home staging for sellers is the focused preparation of a property to appeal to the widest buyer pool and maximize perceived value. In Brampton, staged listings show better online and in person, helping attract stronger offers and faster timelines. The home staging tips for sellers below prioritize speed, impact, and clarity.
By Maunil (Maunil Bhupendra) Shah — Sales Representative, HomeLife/Miracle Realty Ltd., Brokerage
Last updated: July 4, 2026
Summary
Effective home staging highlights space, light, and lifestyle. Focus on curb appeal, deep cleaning, neutral color, repair touch-ups, furniture flow, strategic lighting, and buyer-focused details. In Brampton, align staging with local demand and season, then launch with strong photos and a clear showing plan.
Here’s what you’ll get from this complete guide:
- Clear definitions of staging and what actually moves buyers
- Why it matters for showings, offers, and days-on-market
- Step-by-step plan you can follow in one to two weeks
- Methods compared: DIY, agent-guided, and full-service staging
- Best practices prioritized for Brampton sellers
- Checklists and tools (cleaning, lighting, photography prep)
- Mini case studies from our local listing work
- FAQ answers to what most sellers ask first
What is home staging?
Home staging is the intentional organization, cleaning, repair, and styling of a property so buyers can instantly see its best features and imagine living there. It’s not redecorating; it’s merchandising a home to maximize light, space, and flow for listing photos and in-person showings.
Put simply, home staging turns your house into a product that competes and wins. We focus on three levers: what buyers see first, how rooms feel at a glance, and where eyes land in photos. That’s why light, layout, and cleanliness carry so much weight for sellers.
- Objective: Create a neutral, fresh canvas that signals “move-in ready.”
- Scope: Curb appeal, entry, main living, kitchen, primary suite, key baths, and any flex spaces.
- Outputs: Lighter, cleaner rooms; balanced furniture; consistent color; polished listing photos; confident first impressions.
For Brampton sellers, we align staging to neighborhood buyer expectations, then reinforce it with our property search exposure, an address-based home valuation, and VIP seller reports—so your launch strategy and presentation work together.
Why staging matters
Staging matters because buyers shortlist homes online first. Clean, bright, well-composed photos earn more viewings. Better traffic means more chances for strong offers, shorter timelines, and smoother negotiations. Done right, staging supports value confidence without major renovations.
Here’s the thing: buyers make fast decisions online and emotional ones in person. If the photos don’t pop, they scroll. If the space feels cramped or dark at a showing, they hesitate. Staging removes friction at both points.
- Photos drive showings: Balanced rooms and bright light translate directly to more listing saves and appointments.
- First impressions stick: A clear entry, trimmed landscaping, and a fresh-smelling interior set the tone.
- Signals condition: A maintained, organized home suggests less risk and fewer surprises after inspection.
- Supports negotiation: Confident presentation helps anchor buyer perception around value and care.
We’ve found that pairing smart staging with a precise What’s My Home Worth evaluation and a targeted launch calendar is what consistently lifts outcomes for our Brampton clients.
How home staging works: a step-by-step plan
Successful staging follows a focused sequence: assess, declutter, deep clean, repair, neutralize color, optimize layout, light the space, add fresh touches, then photograph and launch. Execute these steps tightly over one to two weeks for maximum momentum.
Use this 9-step, seller-tested plan. It’s designed to move fast without losing quality.
- Assessment walk-through
- Identify quick wins and high-visibility areas: entry, living, kitchen, primary suite.
- Note odors, pet traces, scuffs, lighting gaps, and storage overflow.
- Set a 7–14 day timeline, then book cleaners and photography.
- Declutter and depersonalize
- Remove 30–40% of visible items. Clear kitchen and bath counters; thin bookshelves; store toys.
- Take down personal photos and bold art that distracts from the space itself.
- Deep clean (hotel level)
- Baseboards, vents, grout, windows, inside appliances. Clean rugs and polish floors.
- Neutralize odors. Keep it fresh for every showing.
- Repair and refresh
- Touch up paint, recaulk tubs, tighten hardware, fix squeaks, and replace tired bulbs.
- Address obvious maintenance items buyers will notice in minutes.
- Neutral palette
- Use light, warm neutrals for walls to maximize brightness and consistency.
- Swap loud bedding, towels, and rugs for calm, soft textures.
- Furniture flow
- Open walkways, float sofas away from walls, and right-size pieces to the room.
- Highlight a focal point (window view, fireplace) and create clear conversation zones.
- Lighting plan
- Layer ambient, task, and accent lighting. Use warm-white bulbs for comfort.
- Before photos and showings: blinds up, sheers open, all lights on.
- Fresh finishing touches
- Greenery, a few neutral pillows, crisp white towels, and a simple dining setup.
- Keep it minimal—every item should serve the photo and the walk-through.
- Photography and launch
- Shoot daytime for natural light and symmetry. Capture wide angles and detail vignettes.
- Coordinate a showing plan and feedback loop for week one.

Types of staging approaches (and how to choose)
Sellers typically choose between DIY staging, agent-guided staging, or full-service staging. Your best option depends on timeline, available furnishings, and support needs. Most Brampton sellers succeed with a hybrid: they handle cleaning and decluttering while we direct layout, styling, and photography.
Here’s a quick comparison to help you decide:
| Approach | Best for | Pros | Watch-outs |
|---|---|---|---|
| DIY Staging | Organized sellers with time and basic furnishings | Flexible, hands-on control; faster starts | Easy to overstyle or miss layout issues; harder to self-critique |
| Agent-Guided | Most occupied homes in average timelines | Professional eye; targeted, high-ROI actions; photography coordination | Still requires seller effort on cleaning and storage |
| Full-Service | Vacant homes or luxury-grade presentation | Complete furnishing and styling; turnkey buyer experience | Requires scheduling and third-party vendors; more logistics |
In our experience working with Brampton homeowners, a structured agent-guided plan gets you 80–90% of the impact with a focused week of work. We provide the room-by-room punch list, prioritize what matters, and ensure photos tell the right story.
Best practices: home staging tips for sellers
Prioritize curb appeal, spotless surfaces, neutral color, balanced furniture, layered lighting, and minimal but fresh styling. Prep like a boutique hotel: simple, airy, and clean. Then plan your photos and first week of showings to capitalize on momentum.
High-impact actions (ranked)
- Curb appeal first
- Power-wash walkway, edge the lawn, trim hedges, and refresh mulch.
- Add two healthy planters at the entry; update door hardware if dated.
- Deep clean shines
- Glass, mirrors, stainless, and floors should sparkle; buyers notice instantly.
- Keep microfiber cloths handy to touch up right before showings.
- Neutral color palette
- Warm, light walls and soft textiles photograph larger and brighter.
- Replace bold bedding and towels with crisp whites and gentle textures.
- Right-size furniture
- Remove bulky pieces; create open traffic lanes at least three feet wide.
- Float seating to define conversation and showcase the focal point.
- Layered lighting
- Use warm-white bulbs and turn on all lights for showings and photos.
- Open blinds and sheers; avoid heavy drapes that block daylight.
- Kitchen and bath minimalism
- Clear counters; keep three tasteful items max (e.g., cutting board, plant, canister).
- Stage with fluffy white towels and a neutral shower curtain.
- Primary suite calm
- Center the bed, use matching lamps, and keep nightstands clutter-free.
- Add a bench or chair to signal comfort and space.
Local considerations for Brampton
- Plan open-house timing with transit access in mind near Torbram Rd at Williams Pky and the Williams - Zum Bovaird Station Stop SB area to simplify visitor flow.
- Seasonal shift: Use evergreen planters and warm porch lighting in late fall/winter; lean on airy textiles and fans in humid summer months.
- Buyer expectations: Many families want flexible space; stage a tidy homework nook or WFH corner to showcase utility.

Tools and resources sellers actually use
You don’t need fancy gear to stage well. Use a simple kit: storage bins, microfiber cloths, magic erasers, touch-up paint, neutral linens, warm bulbs, a few planters, and basic hand tools. Pair this with a clear checklist and a scheduled photo day.
- Staging kit essentials: bins and labels, contractor bags, gloves, all-purpose cleaner, glass cleaner, wood polish, grout brush, magic erasers, painter’s tape, warm-white bulbs, extension cords.
- Textile refresh: white towels, neutral bedding, two to four throw pillows, a soft knit throw, fresh shower liner.
- Quick curb appeal: planters with hardy evergreens, fresh mulch, and a new doormat.
- Photo-day checklist: blinds up, lights on, counters cleared, toilet lids down, pet items stored, driveway empty.
Insider tip: lock your photo shoot first. A firm date creates healthy urgency and keeps your staging effort tight and efficient.
Case studies and real examples (Brampton)
Small, targeted changes move the needle most. In Brampton listings, we consistently see big returns from decluttering, deep cleaning, neutral paint, strategic lighting, and better furniture flow—often in a single week of focused work.
- East Brampton townhome: We guided a family through a seven-day plan—declutter, deep clean, lighter bedding, lamps on dimmers, and a tidy WFH corner. The listing launched with bright photos and weekend showings stacked back-to-back.
- Detached near parks and transit: Landscaping refresh, fresh door paint, and two symmetrical planters reframed the entry. Inside, we floated the sofa and simplified built-ins; photography captured the airy feel.
- Newer condo: Mirrors opposite windows, neutral throws, and a simple dining vignette made the space look bigger. We scheduled showings close together to build momentum.
Across these examples, the pattern is clear: simplicity, cleanliness, light, and flow win buyer attention quickly, both online and during walk-throughs.
How staging connects to valuation and launch
Staging is half presentation, half strategy. Pair your prep with an address-based valuation, a smart launch calendar, and responsive feedback loops. Presentation brings in traffic; pricing precision and timing convert that interest into offers.
- Start with valuation: Use an address-driven estimate to frame your expectations, then refine based on condition and comps.
- Launch week matters: Stack showings in the first 72–96 hours to concentrate demand.
- Feedback loop: Adjust small details quickly—lighting levels, minor decor tweaks, or fresh towels—based on what buyers say.
Want a customized punch list and launch plan? Call or text 647-686-3069. We’ll align staging with your target buyer and timeline.
Common staging mistakes to avoid
Avoid overdecorating, dark rooms, blocked walkways, heavy scents, and cluttered counters. Don’t delay photography while chasing perfection—launch when the high-impact work is complete, then continue small improvements between showings.
- Too much decor: If it doesn’t help the photo or walk-through, remove it.
- Dark, uneven lighting: Inconsistent bulbs and dim rooms reduce warmth and make spaces feel smaller.
- Ignoring odors: Subtle, neutral scents beat heavy sprays that suggest you’re masking something.
- Blocking windows: Heavy drapes or tall furniture can steal your best natural light.
- Skipping repairs: Loose handles and scuffed baseboards create doubt about overall maintenance.
Frequently Asked Questions
Sellers ask about timing, focus areas, and how much staging to do. Prioritize main living areas, kitchen, baths, and the primary suite. Most occupied homes can be staged effectively in one to two weeks with a structured plan and clear photo-day deadline.
How long should I spend on staging before listing?
Most occupied homes can be staged in 7–14 days. Use a tight schedule: declutter, deep clean, repair touch-ups, neutralize color, optimize furniture flow, and finalize lighting. Book photography in advance to keep momentum high and align staging with your first week of showings.
Which rooms matter most for buyers?
Prioritize the entry, main living area, kitchen, primary bedroom, and key bathrooms. These spaces anchor buyer perception in photos and during showings. Secondary bedrooms and basements should be tidy and functional but don’t need heavy styling unless they’re key to your story.
Do I need to buy new furniture to stage well?
Usually not. Remove oversized pieces, borrow a few neutral textiles, and focus on layout and lighting. In many cases, agent-guided staging with your existing items delivers most of the impact. Consider full-service staging only for vacant or premium-positioned homes.
What if buyers still aren’t booking showings?
Reassess photos, lighting, and the first image in your gallery. Confirm launch timing and showing instructions are clear. If presentation is solid, review your valuation relative to recent comparable sales. Small adjustments often restart interest within days.
Key takeaways and next steps
Win online first, then in person. Keep rooms bright, clean, and simple. Focus on curb appeal and main areas, set a firm photo date, and concentrate showings in week one. Pair presentation with a precise valuation and a clear launch plan.
- Keep it simple: Clean, light, and uncluttered always read best.
- Plan the work: A 7–14 day sprint is realistic for most occupied homes.
- Launch strong: Great photos and tightly scheduled showings build momentum.
- Align strategy: Staging supports valuation, timing, and negotiation confidence.
Soft CTA: Want a room-by-room punch list tailored to your home? Call or text 647-686-3069 for a no-pressure consultation. We’ll help you present beautifully and launch with confidence.
Related Articles
If you’re preparing to sell, explore complementary topics like valuation, market timing, and buyer behavior. Understanding these areas helps you pair strong presentation with the right strategy for faster, more confident outcomes.
Helpful next topics to explore include how staging ties into your address-based home valuation, the best time to list in Brampton, and the broader cost to buy a home for the buyers viewing your property. Each of these angles informs the decisions you make before launch.
For additional perspectives on presentation strategy, see a concise explainer on why staging matters, a practical seller’s guide, and an overview of considerations when selling on your own. These viewpoints can supplement the action plan you follow here.