
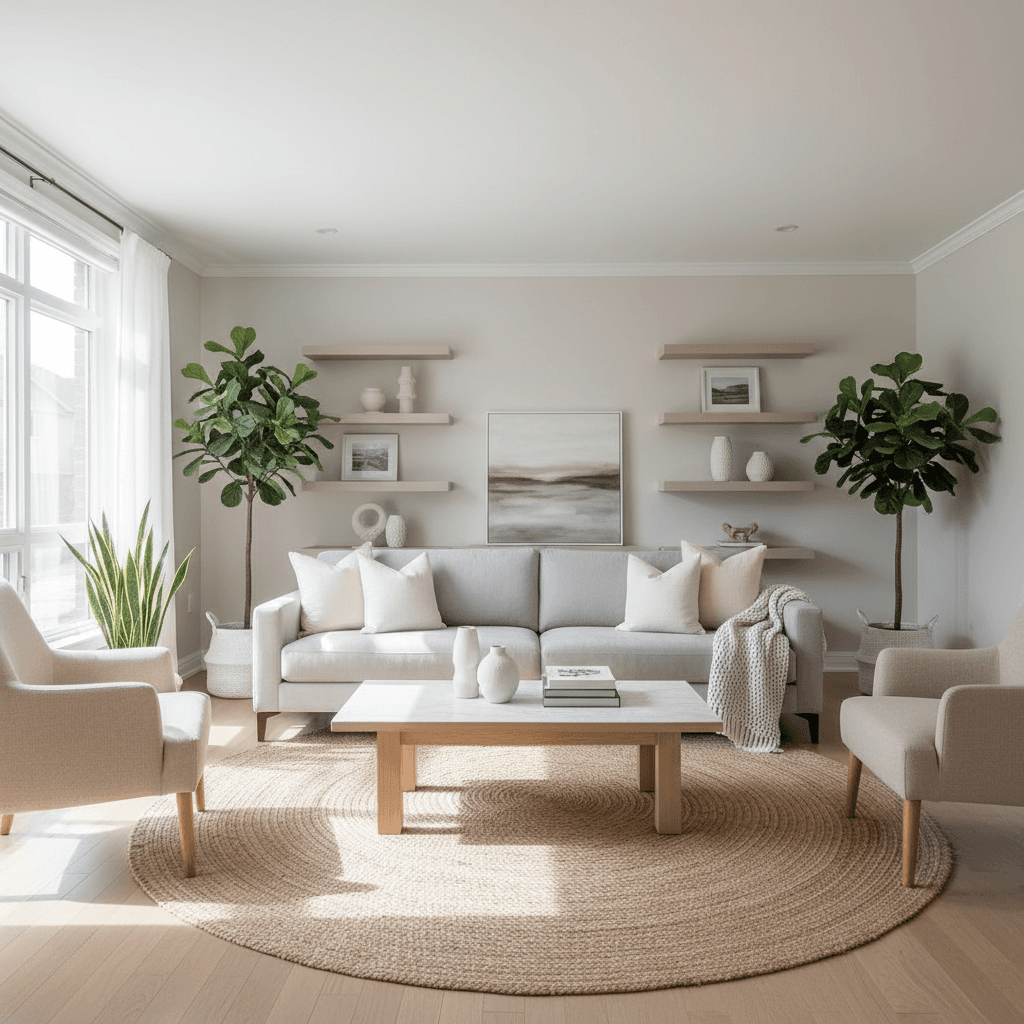
Listing preparation tips for sellers are the specific, repeatable steps that help a home show its best and attract strong offers quickly. At 470 Chrysler Dr #20 in Brampton, we guide local homeowners through decluttering, staging, repairs, photography, and showings so you can launch with confidence and sell on your timeline.
By Maunil (Maunil Bhupendra) Shah, Sales Representative, HomeLife/Miracle Realty Ltd., Brokerage
Last updated: 2026-05-15
At a Glance: What You’ll Learn
This guide breaks down a proven, 30-day seller prep plan tailored to Brampton. You’ll learn what to do, why it works, and how to do it with less stress—covering staging, repairs, photos, showings, pricing strategy, and local nuances that influence buyer behavior and offer strength.
Here’s the thing: most sellers don’t need a renovation—they need a plan. This complete guide gives you one that’s realistic, local, and effective.
- What listing preparation means and how it drives days-on-market down.
- Why preparation matters in Brampton and the wider Regional Municipality of Peel.
- A 30-day, step-by-step process you can follow or delegate.
- DIY vs. pro approaches: when to bring in help and when to keep it simple.
- Best practices: curb appeal, staging, odor control, light, layout, and flow.
- Pricing strategy basics including market comps and an address-based value check.
- Local tools and resources to remove guesswork and speed decisions.
Local considerations for Brampton
- Time listing photos to capture bright daylight; winter skies can be flat, so reschedule or add warm interior lighting. Pro tip: plan travel time around “Williams - Zum Bovaird Station Stop SB.”
- Snow, slush, and spring thaw affect entryways. Keep mats fresh and walkways salted for safe showings.
- Weeknight traffic along Torbram can stretch arrival times. Build 15 extra minutes into showing buffers.
What Is Listing Preparation?
Listing preparation is the structured process of readying a property for market—decluttering, cleaning, repairing, staging, and documenting—so it photographs, shows, and appraises at its best. The goal is simple: increase perceived value, broaden buyer appeal, and compress time to a strong, clean offer.
In practice, it’s a checklist-driven system. You’re not chasing perfection; you’re eliminating friction. Every task should remove a buyer objection or highlight a feature.
Core components and why they matter
- Decluttering and depersonalizing: Aim to remove about 30% of visible items. Rooms look larger, and buyers focus on space, not stuff.
- Deep cleaning: Kitchens, baths, and floors must sparkle. Clean grout lines and dust-free vents signal a well-maintained home.
- Minor repairs: Fix squeaky hinges, leaky faucets, loose handles, and scuffed baseboards. Ten small fixes read like one big improvement.
- Light staging: Neutral textiles, balanced furniture, and greenery improve photos and create flow. Consider a consistent color temperature (2700–3000K) for bulbs.
- Photography readiness: Great photos multiply online attention. Plan for twilight exteriors if curb appeal shines at golden hour.
- Disclosure prep: Organize manuals, receipts, and permits to build trust and answer questions before they become conditions.
We’ve found that when sellers follow a clear prep sequence, they reduce last-minute rushes, keep contractors on schedule, and feel in control. That confidence shows in negotiations.
Why Listing Prep Matters in Brampton and Peel
In Brampton and the Regional Municipality of Peel, strong preparation widens your buyer pool, helps your listing stand out in busy feeds, and supports better terms. Clean, staged, and well-lit homes earn more showing requests and fewer conditional hurdles during negotiation.
Local buyers often preview dozens of listings online before booking a showing. That means your first “showing” is the gallery, not the foyer. Crisp images, clean lines, and clear floor flow push your home into more saved searches and “favorite” lists.
- Seasonal logistics: Entryways bear the brunt of wet boots. Use double doormats and a boot tray to protect floors and project care.
- Commute context: Highlight proximity to transit and shopping. A 5-line bullet list on your features sheet can anchor value in a buyer’s mind.
- Neighborhood signals: Fresh mulch, tidy bins, and edged lawns signal pride of ownership. Many buyers equate exterior care with interior maintenance.
- Photography timing: Overcast skies are common; interior daylight plus warm lamps (no mixed color temps) make rooms feel cohesive in photos.
When working with Brampton sellers, we routinely map prep to buyer expectations: neutral presentation, low visual noise, and simple traffic lines. These details compress days-on-market and smooth conditions after the home inspection.
How Listing Prep Works: A 30‑Day Step-by-Step
Use a 30-day plan: week 1 declutter and plan; week 2 repairs and paint touch-ups; week 3 deep clean and light staging; week 4 photos, marketing materials, and showing prep. This cadence reduces stress, avoids overtime costs, and delivers a show-ready home by launch day.
Think “sequence over sprints.” Breaking work into themed weeks keeps momentum and gives you room to solve surprises without derailing timelines.
30-day preparation timeline (process table)
| Week | Focus | Key Actions | Target Outcome |
|---|---|---|---|
| Week 1 | Declutter + Plan | Reduce items by ~30%, donate/store; identify 6–10 repairs; schedule pros | Clear rooms and firm calendar |
| Week 2 | Repairs + Paint | Fix hardware, caulk, patch/paint high-traffic walls; replace mismatched bulbs | “No projects” appearance |
| Week 3 | Deep Clean + Stage | Appliances, grout, windows; balance furniture; add greenery and neutral textiles | Photo-perfect interiors |
| Week 4 | Photos + Showings | Pro photos; assemble feature sheet; secure valuables; create showing checklist | Launch-ready listing |
Detailed weekly actions
- Declutter with bins: Label three bins—keep, donate, store. Work 30–45 minutes per room to prevent burnout.
- Batch small fixes: Tighten door handles, adjust doors, replace cracked switch plates, lube squeaky hinges, swap old furnace filters.
- Paint for cohesion: If repainting feature walls, select one warm-neutral palette and carry it through sightlines.
- Deep clean sequence: Top-down: ceilings, vents, fans, windows, cabinets, then floors. Replace tired bath caulk for a crisp seal.
- Stage for flow: Pull furniture off walls 3–6 inches; center rugs with sofa front legs on the rug; anchor vignettes with odd-number groupings.
- Photo day readiness: Hide trash cans, remove fridge magnets, coil cables, set consistent bulb temperatures, and open blinds fully.
- Showing checklist: 10 minutes before: lights on, blinds set, soft music low, pet plan in place, counters clear, quick sweep of entry.
We coach sellers to document each step with photos. Progress pictures help you spot missed details and keep everyone aligned on the launch standard.

Approaches: DIY vs. Professional Help
Most sellers can DIY decluttering and cleaning, then hire targeted pros for speed: a painter for high-traffic walls, a handyman for punch-list items, and a photographer for listing images. This hybrid approach maximizes impact while keeping the workflow efficient.
DIY doesn’t mean do everything. It means reserve your energy for what you control—then plug in specialists for high-skill, high-visibility tasks.
When DIY shines
- Light cosmetic refresh: Decluttering, organizing closets, and yard tidy-ups are perfect DIY targets.
- Simple paint touch-ups: If you have a steady hand, patch and roll high-scuff zones to unify sightlines.
- Daily show-ready routine: 10-minute pre-showing resets (lights, blinds, counters) keep momentum.
Where pros add leverage
- Photography: Professional images increase online engagement and set impression anchors.
- Handyman punch-list: One visit can knock out 10–15 small repairs that would take you a weekend.
- Painter/caulker: Clean edges and crisp lines pay off in photos and during inspections.
Quick comparison
| Task | DIY | Professional | Best For |
|---|---|---|---|
| Declutter | Yes | Optional organizer | Speed + control |
| Deep clean | Often | Cleaning crew | Larger homes/tight timelines |
| Paint touch-ups | Sometimes | Pro painter | Photo-perfect walls |
| Photography | No | Required | Marketing quality |
| Minor repairs | Maybe | Handyman | Consistency + safety |
We often see the best results when sellers DIY decluttering over two weekends, then schedule a one-day handyman + one-day painter combo the following week. It keeps momentum and delivers a camera-ready finish.
Best Practices Sellers Swear By
Focus on light, smell, and flow. Bright rooms, fresh air, and clear traffic lines create instant comfort. Add curb appeal, stage with restraint, and remove 100% of visible clutter from kitchens and baths. These simple disciplines drive more showings and cleaner offers.
Curb appeal in one afternoon
- Edge lawn borders and rake mulch; place two matching planters at the entry.
- Pressure-wash front steps and sweep the walkway before photos and every showing day.
- Replace a tired doormat and polish the door handle for a welcoming “handshake.”
Make living areas feel larger
- Float sofas off the wall 3–6 inches and center rugs to unify seating areas.
- Use one hero art piece per main wall rather than clusters that fragment focus.
- Switch to 2700–3000K LED bulbs home-wide to avoid patchy color temperatures.
Kitchen and bath photo rules
- Zero countertop appliances in photos; add back daily items after.
- Fresh white towels and a single plant add texture without distraction.
- Remove toilet lids and use new shower curtains or spotless glass.
Here’s what most people don’t realize: buyers forgive “dated” faster than “dirty.” Clean wins, every time. Invest your effort there first.

Pricing Strategy Basics for Sellers
Price is a strategy, not a number. Use recent comparable sales, current competition, and your home’s prep quality to set a launch price that attracts maximum eyeballs in week one. A data-backed range plus crisp presentation creates urgency and stronger terms.
You might be wondering, “Where do I start?” Begin with two checks: a current market scan and an address-based value estimate. Pair those with on-the-ground condition notes from your prep work.
- Comparable sales (90 days when possible): Focus on similar beds, baths, lot type, and finish level. Adjust mentally for upgrades and prep quality.
- Active competition: What would a buyer see within a 1–2 km radius and the same price band? Your photos and finish must compete at a glance.
- Condition premium: A spotless, staged home earns more private showings. More showings mean better chances of multiple offers.
- Launch timing: Thursday go-lives often maximize weekend showings. Align contractor schedules for a clean runway.
In our experience, sellers who treat “price” and “presentation” as twins achieve smoother negotiations. Prep creates the justification; data creates the confidence.
Tools and Resources for Brampton Sellers
Use a simple property search, an address-based value check, and clear buyer/seller reports to cut guesswork. Add a repeatable prep checklist and a showing-day routine. These tools remove friction, speed decisions, and keep your timeline on track.
Practical, ready-to-use resources help you move from intention to action. Build your toolkit before day one so you’re never waiting on the next step.
- Prep checklist: Turn the 30-day plan above into a printout. Check boxes daily; photograph each completed zone.
- Address-based value estimate: Start with a quick home value check to frame your pricing discussion and identify upgrade priorities.
- Local property search: Monitor new listings and price movements nearby to understand how your home stacks up.
- Buyer and seller reports: Use concise market reports to understand inventory shifts and showing patterns.
- Showing kit by the door: Microfiber cloths, glass cleaner, lint roller, and a bin for last-minute clutter.
For additional perspectives on sale preparation, you can scan a concise FSBO prep checklist and a practical Ontario marketing guide. If you’re weighing different sale paths, a short read on value drivers for your home can help frame decisions.
Case Studies: How Smart Prep Changed Outcomes
Well-sequenced prep compresses time to offer and reduces negotiating friction. In Brampton, we’ve seen tidy entryways, unified paint, and pro photos translate into more showings in week one and cleaner conditions at offer time—especially when paired with a clear features sheet.
Mini examples from recent seller journeys
- Townhome flow fix: Removing one oversized chair and centering the rug created a defined conversation area. Photos looked balanced; the seller logged a busier first weekend.
- Entry reset: New mat, polished handle, and a planter pair. The small investment raised first-impression scores during showings and photos.
- Bathroom refresh: Fresh caulk and bright bulbs erased “project” vibes. Buyers focused on space, not fixes.
- Kitchen declutter: Zero-counter rule for photos; two daily items returned after. Online gallery felt premium and clean.
- Lighting unification: Swapping mixed bulbs for 3000K LEDs made rooms feel cohesive and photogenic.
- Feature-sheet clarity: A five-bullet location summary (transit, parks, grocers) anchored value for commuters.
What moved the needle most
- Consistency across rooms: One paint palette and matching hardware finishes reduce visual noise.
- Clean windows and screens: Brighter rooms, better photos, and a fresher smell after a rainy day.
- Pre-inspection touch-ups: Fixing small water stains (where cause resolved) headed off inspection drama.
These are simple, repeatable moves. You don’t need to guess—just execute the plan and measure your progress by photos and checklists.
FAQ: Listing Preparation Tips for Sellers
Sellers ask about timing, what to fix, how much to declutter, and when to schedule photos. The short answers: start 30 days out, fix what buyers touch and see first, remove about one-third of visible items, and book photos once repairs and cleaning are complete.
How far in advance should I start preparing my home?
Begin 30 days before your target list date. Week 1 for decluttering, week 2 for repairs and paint touch-ups, week 3 for deep cleaning and light staging, and week 4 for photos and showings. This cadence keeps stress manageable and yields a camera-ready home.
Which repairs create the biggest impact?
Prioritize fixes buyers touch and see: door hardware, leaky faucets, loose handrails, chipped paint, and old caulk. Then address safety items like GFCI outlets in wet zones. Ten small, visible improvements add up to one big “well-maintained” impression.
Do I need professional staging?
Not always. Most homes benefit from light, photo-oriented staging: neutral textiles, balanced furniture, greenery, and consistent lighting. Hire a stager when rooms feel small, the layout is tricky, or vacant spaces need scale and warmth to translate online.
When should I schedule listing photos?
Book photos after repairs, paint touch-ups, and deep cleaning are complete. Aim for bright daylight. If exteriors shine at sunset, add a twilight exterior. Remove fridge magnets, hide trash cans, and set consistent 2700–3000K bulbs for a cohesive look.
Conclusion and Next Steps
A clean, cohesive, and well-lit home—launched with a 30-day plan—earns more attention, better terms, and fewer surprises. Focus on buyer-first details, sequence your prep, and document progress. That’s how you list with confidence and negotiate from strength.
Key takeaways
- Prep is a system: declutter, repair, clean, stage, photograph, show.
- Light, smell, and flow shape first impressions more than decor.
- Hybrid approach wins: DIY basics, pros for photos and precision work.
- Price and presentation are twins—treat them together.
Action steps
- Pick a target list date 30 days out and map the weekly plan.
- Assemble your showing kit and print your prep checklist today.
- Walk through your home at buyer height: touch what they’ll touch, fix what you feel.
- Call or text 647-686-3069 to coordinate your personalized seller prep plan.
Soft CTA: Prefer a guided process? Reach out and we’ll customize the plan to your address, condition notes, and timeline in Brampton.