
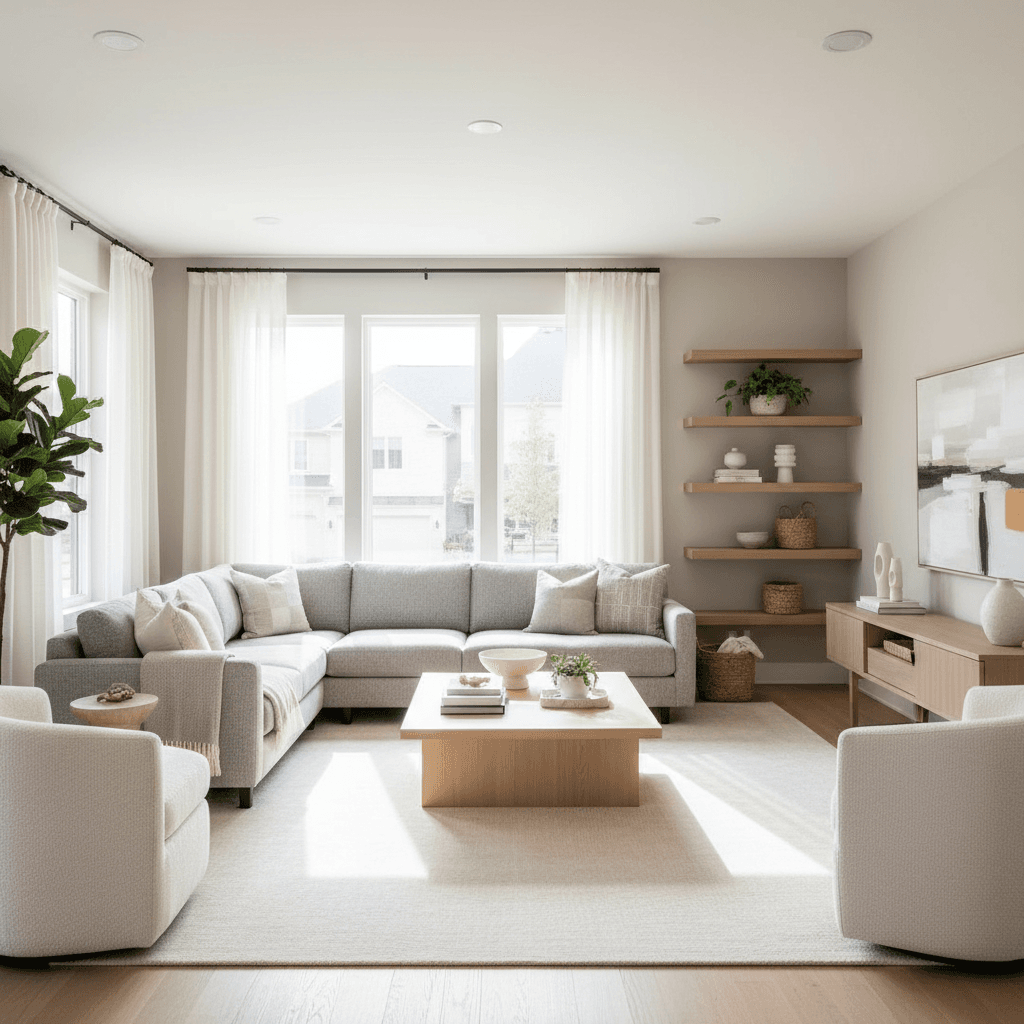
Real estate tips for first-time sellers are the clear, step-by-step actions that prepare, price, market, and negotiate your first sale. From our office at 470 Chrysler Dr #20 in Brampton, we guide neighbors through listing strategy, staging, showings, and paperwork so you can sell confidently on a predictable timeline.
By Maunil Shah — Sales Representative, HomeLife/Miracle Realty Ltd., Brokerage
Last updated: 2026-06-03
Quick Summary
First-time sellers win by nailing five pillars: accurate pricing, targeted prep, polished marketing, flexible showings, and clean paperwork. Use a data-driven value estimate, stage the big three rooms, launch with full MLS exposure, respond to feedback fast, and negotiate the full offer package—not just price.
If you’re selling for the first time, your edge is simple structure. A checklist-driven plan reduces stress and shortens days on market. You don’t need to overhaul the entire property; you need to prioritize what buyers notice first, remove friction from showings, and communicate value with clarity.
- Price to the market you have—not the one you wish for—using recent comparable sales.
- Stage living room, kitchen, and primary bedroom; add neutral color, bright light, and greenery.
- Publish a complete listing with quality photos, room sizes, and a benefit-led description.
- Approve short-notice showings; keep the home photo-ready to capture commuter traffic.
- Negotiate terms beyond price: conditions, inclusions, deposit, and closing date.
What Is First-Time Home Selling?
First-time home selling is the end-to-end process a homeowner follows to list and close their first sale. It includes valuation, preparation, marketing, showings, negotiation, and closing. A structured approach reduces stress, improves buyer interest, and helps you achieve a smoother closing.
In practice, you’re shifting from living in a space to selling a product. That product is your home’s story: location, lifestyle, and condition. The clearer that story, the easier it is for buyers to see themselves in it. Real estate tips for first-time sellers focus on sequence and simplicity—do the right few things, in the right order, and measure results in the first week.
Why sequence matters
- Valuation informs prep. A realistic range tells you how much work is truly needed.
- Prep improves marketing. Neutral paint and bright lighting make photos stand out.
- Marketing drives showings. Showings create feedback loops that refine pricing.
- Clean paperwork prevents delays. Accurate forms keep your closing on track.
In our experience helping Brampton sellers, simple improvements—like 30–40% decluttering, a fresh neutral coat in high-traffic areas, and warm-white LEDs—raise photo quality and increase showing requests within the first 72 hours. Momentum early often leads to better offers later.
Why These Tips Matter in Brampton (and Peel)
Brampton sits within the Regional Municipality of Peel, where commute access, school zones, and supply levels affect demand block by block. Pricing to nearby sales, staging for family use, and timing around local patterns help listings rise to the top and attract motivated, qualified buyers.
Local context matters. Detached homes near key routes may draw more weekday evening showings, while townhomes with finished basements appeal to multi-generational buyers. We adjust strategy by property type and micro-location, then act on feedback from the first 7–10 showings to correct course quickly if needed.
Local considerations for Brampton
- Plan showing windows to avoid peak bus flow near Torbram Rd at Williams Pky; keep driveways and curbs clear to simplify access.
- Early spring listings tend to see more foot traffic; in winter, keep paths shoveled, lights bright, and interiors warm to improve first impressions.
- Expect last-minute weekday requests from commuters; approve short-notice showings to capture buyers traveling near Williams - Zum Bovaird Station Stop SB.
Real Estate Tips for First-Time Sellers: Pricing Strategy
Price with a tight, data-backed range. Use recent comparable sales (60–90 days), adjust for condition and features, and anchor to the market today. Reassess after the first 7–10 showings. A right-price launch attracts serious buyers and strengthens your negotiating position.
Pricing is positioning. Your list price is a signal that places your home among competing options buyers will see this week. Start with three to five closely matched comparable sales. Match style, size, age, and condition. Adjust for upgrades, lot size, parking, and basement finish to create a sensible range—not a single magic number.
- Timeframe: Prioritize sales from the past 60–90 days; markets shift quickly.
- Condition: Align to the home’s current state; overpricing clean but unrenovated spaces stalls momentum.
- Feature adjustments: Add or subtract for finished basements, parking spots, lot depth, and outdoor living.
- Signal strength: Early interest (showings and inquiries) in the first 72 hours validates the range.
- Feedback loop: If the first 10 showings don’t yield strong signals, adjust quickly rather than waiting weeks.
Here’s the thing: buyers compare in real time. If your photos, description, and price tell a cohesive story, you’ll see 15–30 listing saves and frequent evening showings within days. If not, revisit your top three comparables and the first round of buyer feedback to spot friction.
How First-Time Selling Works: Step-by-Step
First-time sellers succeed by following phases: assess value, prep the home, craft the listing, launch on MLS, manage showings, negotiate offers, and close cleanly. Each phase has a short checklist that reduces stress and keeps your timeline predictable.
Step 1: Assess value with data
- Pull 3–5 comparable sales (last 60–90 days) matched on style, size, and age.
- Adjust for upgrades, lot, parking, and basement finish; produce a range.
- Confirm with an on-site walkthrough to capture condition nuances.
Step 2: Prep what buyers notice first
- Walls: Fresh, neutral paint in high-traffic areas and the primary bedroom.
- Lighting: Warm-white LEDs; replace dated entry, kitchen, and dining fixtures.
- Floors: Fix squeaks; refinish or deep clean for a uniform look.
- Kitchen/baths: New hardware, spotless grout, and minimal counter decor (3–5 items).
Step 3: Create a standout listing
- Photography: 15–30 crisp images, exterior first, then brightest rooms.
- Headline: Lead with a defining benefit (e.g., finished basement with separate entrance).
- Description: Stack benefits top to bottom; call out updates and commuter access.
Step 4: Launch and syndicate
- Publish to MLS with accurate fields, room sizes, and details; broad reach drives showings.
- Host a weekend open house and weekday evening showings for commuters.
- Track showing counts and feedback in the first 72 hours; remove friction fast.
For deeper listing mechanics, see this practical real-estate listings guide that outlines common fields and buyer expectations in modern listings.
Step 5: Negotiate offers
- Evaluate price, deposit, conditions (financing, inspection, status), inclusions, and closing date.
- Counter with clarity—change one or two variables per round and keep backups warm.
- Use buyer feedback to justify your stance; document terms to avoid confusion.
Step 6: Close cleanly
- Confirm condition removals and lender instructions in writing.
- Schedule lawyer, keys, utilities; gather manuals and warranties for the buyer.
- Ensure a broom-clean final walk-through; tag inclusions and test key systems.
Approaches: House vs. Condo, Agent vs. DIY
Your approach depends on property type and time. Houses lean on curb appeal and exterior care; condos hinge on rules, amenities, and a clean status certificate. Full-service agency support simplifies pricing and negotiation; DIY trades time for control and a learning curve.
House vs. condo: what actually changes
- Houses: Prioritize exterior fixes, roofing age, eaves, grading, gutters, and parking capacity.
- Condos: Verify fees and special assessments; obtain an up-to-date status certificate early.
- Both: Declutter 30–40%, deep clean, and stage the living room, kitchen, and primary suite.
Agent-led vs. DIY
- Agent-led: Coordinated vendors, pro marketing, buyer screening, skilled negotiation, and brokerage compliance.
- DIY: Full control but higher time demand; you manage showings, disclosures, and forms.
- Hybrid: Consult on pricing and prep, then choose service level before listing.
| Process Area | Agent-led | DIY/For-Sale-By-Owner |
|---|---|---|
| Pricing | Comparative analysis, live feedback loop | Public portals, self-researched comps |
| Marketing | Pro photos, MLS syndication | Limited platforms, self-shot photos |
| Showings | Managed scheduling, buyer vetting | You coordinate all requests |
| Negotiation | Experienced tactics, risk spotting | Self-negotiated; steeper learning curve |
| Paperwork | Brokerage compliance support | Self-managed forms and timelines |
Not sure which path fits? Start with an address-based value estimate and a 20–30 minute consult to map your timeline and service needs. Decide the level of support after you see the workload broken into phases.
Best Practices That Move the Needle
Prioritize what buyers see first, deliver a spotless listing package, and respond fast to feedback. Neutral paint, bright lighting, pro photos, a benefit-led description, and flexible showings consistently increase views, cut days on market, and strengthen your negotiating leverage.
Prep and presentation
- Stage the big three: living room, kitchen, primary bedroom. Add fresh textiles and greenery.
- Declutter surfaces to one-third of normal; pre-pack seasonal and bulky items now.
- Fix small defects buyers notice: caulk lines, door latches, running toilets, and squeaky hinges.
- Use warm-white LEDs across fixtures for consistent, bright photos and showings.
Minor, fast wins compound. A weekend of paint, lighting updates, and curb appeal touch-ups often doubles showing requests the first week. We’ve seen 15–30 online saves and multiple evening showings when photos communicate “move-in ready” at a glance.

Marketing and showings
- Publish 15–30 high-quality photos and a 250–400 word description focused on benefits.
- Enable same-day showings; approve 15–30 minute windows where possible.
- Document feedback after the first 10 showings; adjust copy, photos, or access friction.
Want a second perspective on seller prep checklists? Compare against this concise external seller’s guide overview to make sure you’ve covered the essentials.
Negotiation and risk
- Evaluate full terms: deposit, conditions (financing, inspection, status), timing, and inclusions.
- Counter with intent—improve certainty when price is firm, or improve price when timing is flexible.
- Keep backup offers warm until the deal is firm to protect your move plan.
Soft CTA: Need a second set of eyes on your plan? Book a brief, no-pressure consult to align price range, prep scope, and your moving timeline before you list.
Tools and Resources for First-Time Sellers
Combine a quick home value estimate, a room-by-room prep checklist, and a clear launch plan. Centralizing tasks and data reduces stress and speeds up decisions when offers arrive. Pair online tools with an on-site consult for condition-specific advice.
- Address-based value estimate: Set a realistic range before investing time in prep.
- Seller prep checklist: Walls, lighting, floors, fixtures, curb appeal, and photography prep.
- Listing launch plan: Timeline for photos, MLS activation, open houses, and early feedback review.
- VIP market reports: Neighborhood activity snapshots and trend summaries to guide timing.
- Consultation: Align pricing, timing, and move logistics; decide support level (agent-led, hybrid, or DIY).
If you’re weighing timing for your sale, compare your plan to a nearby metro’s seasonality insights in this best time to sell discussion and adjust for your neighborhood’s showing patterns.
Case Studies and Examples (Brampton)
Targeted, fast improvements create outsized results. Neutral paint, lighting upgrades, and tidy landscaping often increase showing requests within days. The examples below show how focused prep and a clean launch translate into stronger offers and smoother closings.
Example 1: Semi-detached near commuter routes
Pre-list work: neutral paint, LED lighting, fresh mulch, and trimmed hedges. Launch: full MLS fields, 24 photos, weekend open house. Result: showing traffic doubled the first weekend; multiple interested buyers by day four.
Example 2: Condo with a dated kitchen
Prep: hardware swap, fresh caulk, under-cabinet lights, and styled counters. Listing: benefit-led headline (bright, open-plan), 18 photos. Result: brighter photos and strong first-week interest; accepted offer with clear conditions.
Example 3: Move-up sellers timing school calendars
Strategy: list just before spring break; weekend open house plus weekday evenings. Coordination: buyer visits aligned with after-school windows. Result: steady showings, quick negotiations, and a closing date that matched their purchase.
Example 4: Townhome with limited storage
Action: declutter to 30%, add closet systems, and highlight nearby parks. Outcome: fewer objections about storage; buyers focused on location and layout.
Example 5: Bungalow appealing to downsizers
Action: safety-focused updates (handrails, brighter lighting), one-level living benefits in description. Outcome: more weekday showings; smooth conditional period.
Example 6: Detached with unfinished basement
Action: clean, paint floors, and stage as a flexible space (gym/office). Outcome: buyers saw potential; objections shifted from “unfinished” to “future-ready.”
Example 7: Corner-lot curb appeal boost
Action: edge lawns, add mulch, paint front door, update house numbers, and pressure-wash walkway. Outcome: stronger exterior photos; more open-house visitors.
Example 8: Pet-friendly home concerns
Action: deep clean carpets, repair scratches, store pet items for photos/showings. Outcome: reduced allergy objections; cleaner impressions.
Example 9: Busy household showings
Action: pre-pack bins, establish a 15-minute tidy routine, limit cooking odors, and set auto-lights. Outcome: approved more short-notice requests; more total showings.
Example 10: Condo status certificate readiness
Action: order status certificate early; summarize fees and inclusions in the listing. Outcome: faster decisions; fewer surprises during conditions.
Example 11: Home office trend
Action: stage a quiet, well-lit workspace with cable management and greenery. Outcome: buyers lingered longer; office photos drove saves.
Example 12: Backyard as a bonus room
Action: define zones—seating, grill, and kids’ play—using planters and outdoor rugs. Outcome: lifestyle appeal increased; better weekend traffic.
Example 13: Lighting transformation
Action: switch to consistent warm-white LEDs and add mirrors opposite windows. Outcome: brighter spaces photographed better; listing views increased.

Key Takeaways
Keep it simple: price with data, present a move-in-ready look, market widely, enable easy showings, and negotiate the full offer package. A clean plan executed fast shortens your timeline and improves outcomes in competitive neighborhoods.
- Use 3–5 recent comps and reassess after the first 7–10 showings.
- Stage the big three rooms; aim for bright, neutral, and clutter-free.
- Publish complete MLS details with 15–30 crisp photos and a benefit-led description.
- Approve short-notice showings and track feedback to remove friction quickly.
- Negotiate on certainty, timing, and inclusions—not just price.
Frequently Asked Questions
First-time sellers usually ask about timing, repairs, photos, and handling low offers. The short version: list when you can show your best, fix what buyers notice, use professional-looking photos, and respond to offers strategically with data and clear terms.
When is the best time to list?
List when your home shows at its best and you can support frequent showings. In Brampton, early spring through early summer often draws more buyers, but a well-prepared home can attract attention any season if pricing and marketing are dialed in.
Do I need to renovate before selling?
Focus on high-impact basics: neutral paint, consistent lighting, minor repairs, deep cleaning, and curb appeal. Full renovations aren’t necessary for a strong sale. Prioritize updates that improve photos and first impressions to increase showings and buyer confidence.
How many photos should my listing include?
Aim for 15–30 high-quality photos that tell a complete story. Lead with the exterior, then the brightest rooms, and finish with key features. Quality matters more than quantity—crisp, well-lit images drive more showings than a large set of average shots.
What if I get low offers?
Stay calm and respond with data. Counter strategically on price or terms to improve certainty. Keep communication open with other interested buyers. Strong marketing, proper pricing, and early feedback tracking reduce the chance of persistently low offers.
Conclusion and Next Steps
Win your first sale by pricing with data, presenting a move-in-ready look, marketing widely, enabling easy showings, and negotiating complete offers. A simple, fast plan creates momentum—and momentum attracts better offers.
- Confirm your price range with recent comps and an on-site assessment.
- Knock out quick prep: paint, lighting, small repairs, and a deep clean.
- Launch with complete MLS details, crisp photos, and flexible showings.
- Negotiate the whole offer—price, conditions, timing, and inclusions.
Ready to get started? Let’s align pricing, timing, and a move plan from right here in Brampton. We’ll use our address-based valuation, market reports, and a focused launch plan to help you sell with confidence.